Grilled Greek Lemon Chicken with Creamy Tzatziki Sauce

Grilled Greek Lemon Chicken with Creamy Tzatziki Sauce

2588CD42-1C5E-47BC-94A2-349FFD4B9322

<<• First of all, I have to apologize. I haven’t posted in months and there were many things that happened and I couldn’t keep up. I am sorry!

<<• Secondly, I want to thank you! Thank you for following my journey whether you just subscribed or have been with me since day one! I appreciate each one of you!

<<• Thirdly, I promised that I would share the good, the bad, and the ugly. Working full time, going to school at night full time, and expanding my wine biz, it’s been a lot. Plus I was in the hospital for a week and was diagnosed with my 6th autoimmune disease. I know, another one.

<<• So right now, I want to keep my life more zen. I’m not taking any classes this summer, so I want to dedicate my time, doing the things I love. Like this 🙂

<<• I know, I know… you’re asking where is that recipe? Why is there all this writing before the recipe? Can I just have the recipe?? Haha

Grilled Greek Lemon Chicken with Creamy Tzatziki Sauce

2588CD42-1C5E-47BC-94A2-349FFD4B9322

What You Need:

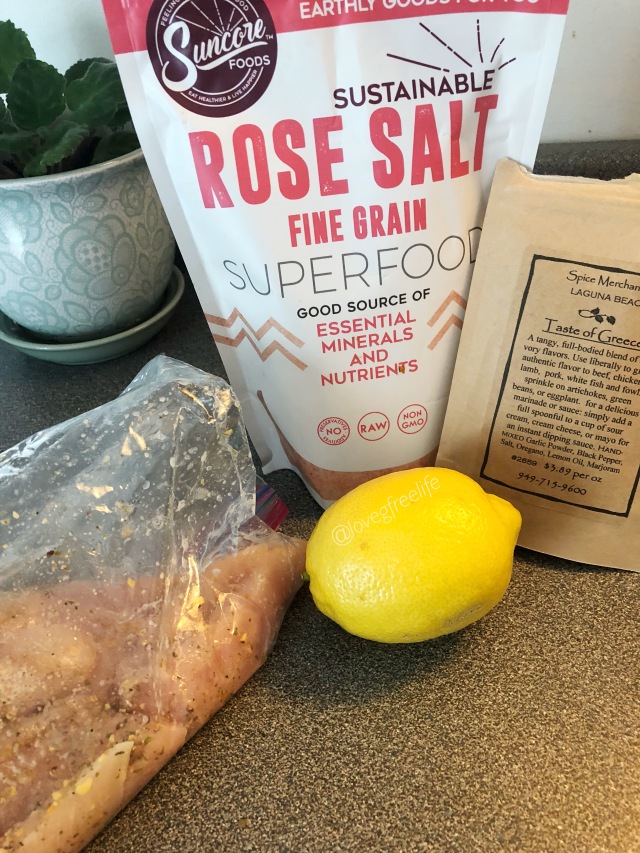
• Free Range, Organic Chicken

•Greek Spice Mixture

•Fresh Lemon Juice

•Olive Oil

•Greek Yogurt

•Cucumber

• 2 Large Garic Cloves, minced

•Salt and Pepper

What To Do:

1. Prepare the chicken to marinate for two hours (at least). In a ziplock baggie (gallon), throw in your chicken, 2 tablespoons of olive oil, a dash of salt, and the Greek spices.

E0C5AA8F-E773-4CED-AFAA-49824F3FA676

2. Wash and shred your cucumber. Place them between paper towels to get out the extra moisture out. Let that sit for an hour.

DC37219F-E10D-4FB8-9732-5B6E74229777

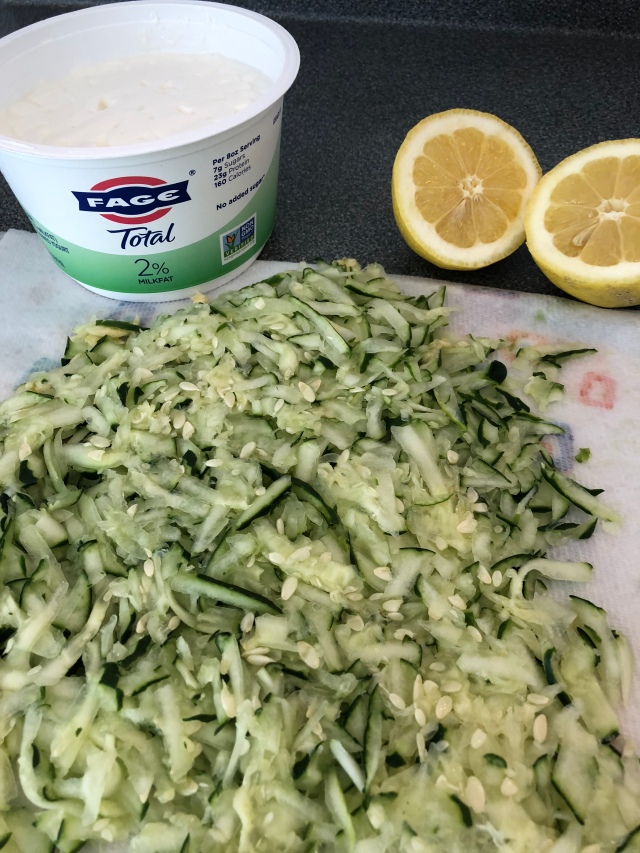
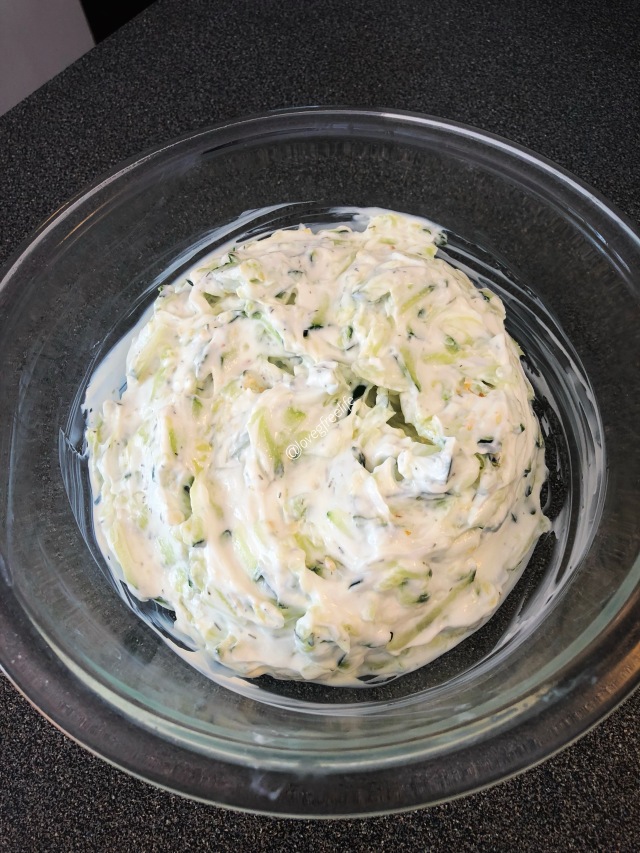
3. Make your Tzatziki Sauce. In a large bowl, combine a container of Greek yogurt, juice from half of a lemon, cucumbers, garlic, and salt to taste.

4. Let the Tzatziki Sauce chill in the fridge until it is time to eat.

E7531486-7E59-4147-9B23-D32CBFBD660D

5. Grill your chicken and eat with the Tzatziki Sauce!

Enjoy xoxo2588CD42-1C5E-47BC-94A2-349FFD4B9322

Quick and Easy Taco Dip

Easy Taco Layer Dip

taco-dip-8

This is a quick and easy dish to make and bring to a party or for when you have a fiesta at your place. Our Thanksgiving tradition is to have a Mexican Fiesta the day after Thanksgiving. I make my famous fresh margaritas and this year I made this taco layer dip.

I am not going to lie when I said that this Thanksgiving was such a mix of emotions. We were missing two very important people at our table and I didn’t even want to celebrate. This is the first holiday without my mom and recently my uncle also unexpectedly passed away. Our family has been through so much these past two years, so many tragedies and too many deaths. Thankfully, I have the support of my family and friends but it is hard to understand how I am feeling because everyone feels different when a death occurs. I am thankful for my friends and family, my ever-changing health, my dog, my students and coworkers, the support of my lovegfree life community, and being able to share my story along with the struggles that I am facing. Take a minute and reflect on what you are thankful for. Even when it seems like your world is crashing down, there is always something to be thankful for.

What You Need:

Gluten Free Refried Beans

Sour Cream or Greek Yogurt

Gluten Free Taco Seasoning (or you can go back to my taco recipe for a homemade version of my own Taco Seasoning)

Guacamole

Cheddar Cheese, shredded

Tomatoes, diced

Olives, sliced

Lettuce

Tortilla Chips

What To Do:

taco-dip-1

In a large baking dish, put down a layer of refried beans.

taco-dip-2

Mix together the sour cream/Greek yogurt with the taco seasoning.

taco-dip-3

Put the mixture on top of the refried beans and layer on the guacamole and cheddar cheese.

taco-dip-4

On top of that, sprinkle the tomatoes, olives, and lettuce.

taco-dip-5

taco-dip-7

Serve the dish cold with tortilla chips and with a delicious fresh strawberry margarita!

taco-dip-8

Enjoy xoxo

margs-1

Italian Style Pasta Salad

Italian Style Pasta Salad

pasta salad 2

Happy Labor Day! Hope everyone is having a relaxing and fun weekend!

When you have food allergies or Celiac Disease, going to parties or cookouts can be a scary thing. You’re not sure who made what, if food was cross-contaminated, or if it contains secret allergy additives. Typically when I go to a cookout, I will bring a dish I know that I can eat and I will ask what is being served. If you have a question about something, don’t eat it! It is not worth it! This quick and easy Italian Style Pasta Salad is a great dish to bring anywhere.

What You Need:

Gluten Free Pasta

Orange Pepper, chopped (you can use any color)

Grape Tomatoes, diced

Can of Gluten Free, BPA Olives, sliced

Mozzarella Mini Balls

Fresh Basil, chopped

Italian Seasoning (I used Trader Joes 21 Mix and an Italian Season Grinder)

Olive Oil

Apple Cider Vinegar (I ran out of red wine vinegar)

Liquid Amino Acids

What To Do:

Cook the pasta according to the directions. I slightly over cook the pasta (not so it is a gooey mess) but so that the pasta stays soft. Sometimes with gluten free pasta, the noodles when cold do not stay soft like regular pasta does.

When the pasta is done cooking and cooled, put the pasta in a bowl. Add all veggies and olives. Drizzle the olive oil on top and mix until the pasta is coated. Mix in about 1/8 cup of apple cider vinegar. Remember that this vinegar has a sweeter taste so add 2 teaspoons of liquid amino acids to balance the sweetness. Depending on how seasoned you like your pasta salad; add in seasoning and taste as you go! Add the mozzarella balls and fresh basil. Let the pasta salad sit for about an hour to let all the flavors incorporate.

Don’t be afraid to experiment. I was going to use red wine vinegar but I ran out. I also had run out of balsamic so I used apple cider (clearly I need to go shopping).  Knowing that it is a sweeter vinegar, I had to balance the flavors with something a bit saltier. You can use any mixture of vegetables in your pasta salad and try different combos of spices.  Cooking is fun so don’t be scared to try different things.  If it doesn’t come out the way you wanted it, then you know for next time! Enjoy! xoxo

pasta salad 1


Crispy Oven Baked French Fries

Crispy Oven Baked French Fries

ff4

As much as possible, I like to make sure I am eating whole foods and not processed or frozen items. When in a pinch, you can find some healthier options, but with a quick and easy recipe to make crispy French Fries, you won’t need to reach for the freezer or the drive thru.

People often think that potatoes aren’t healthy. They can be if you eat them fried or drenched in unhealthy condiments. Potatoes are full of fiber, potassium, and vitamins B and C. They also contain a variety of phytonutrients that have antioxidant properties. Phytonutrients help prevent diseases and help maintain our body’s natural defenses.


What You Need:

Potatoes (you can use any type)

Olive Oil

Salt

What To Do:

Preheat the oven to 400 degrees while prepping your potatoes. Slice your potatoes into rectangles with how thick you would like them. The thicker the slices, the longer they will need to cook and the softer they will be in the inside.

ff1

Dry them with a paper towel. On a baking sheet, drizzle some olive oil, and place the potato slices on. Sprinkle some salt and pepper on and mix the flavors together.

ff2

Put them into the oven for 20 minutes, flip and cook another 10. Remember the thicker the potato, the more they will need to cook. You want the outside to be nice and crispy!

ff3