Strawberry Chocolate Hazelnut Crepes

Strawberry Chocolate Hazelnut Crepes

crepes

Crepes, delicious crepes… When I think of crepes, I think of the time I visited the Eiffel Tower and had the most delicious chocolate hazelnut banana crepe.

21067_838910988591_7077880_n

Let me tell you, nothing beats that crepe but crepes are so easy to make! You can make sweet or savory crepes and experiment with different combinations. Best part is, you can make them ahead of time and freeze them! Just put a piece of wax paper in between each layer.

Let’s get ready to cook!

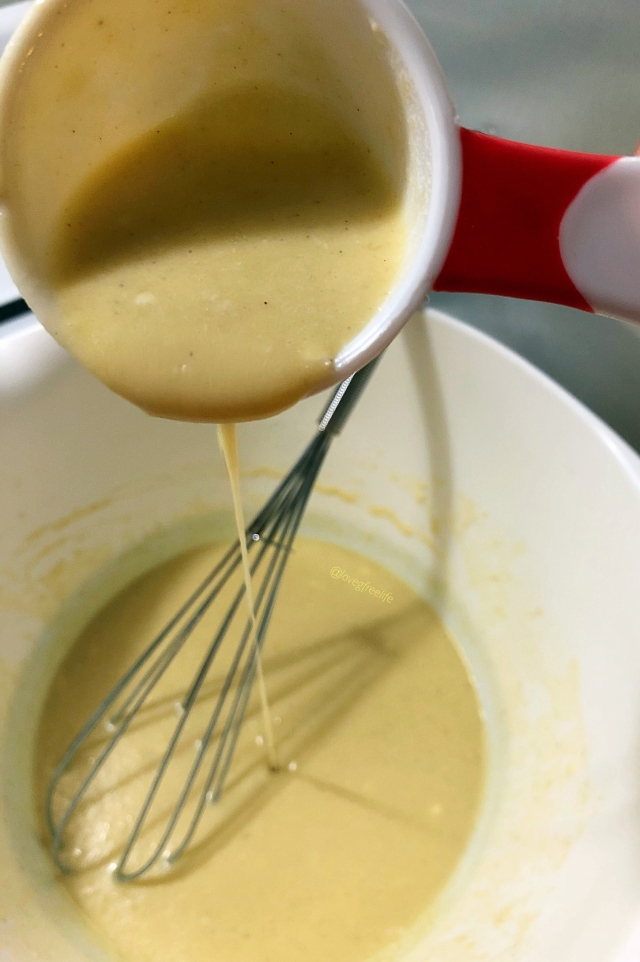
Combine flour, milk, eggs, and salt into a blender. Using a blender is easier but you can use a whisk as well. I like to blend and then whisk as I go. The crepe mixture should be very thin and runny.

crepes 1

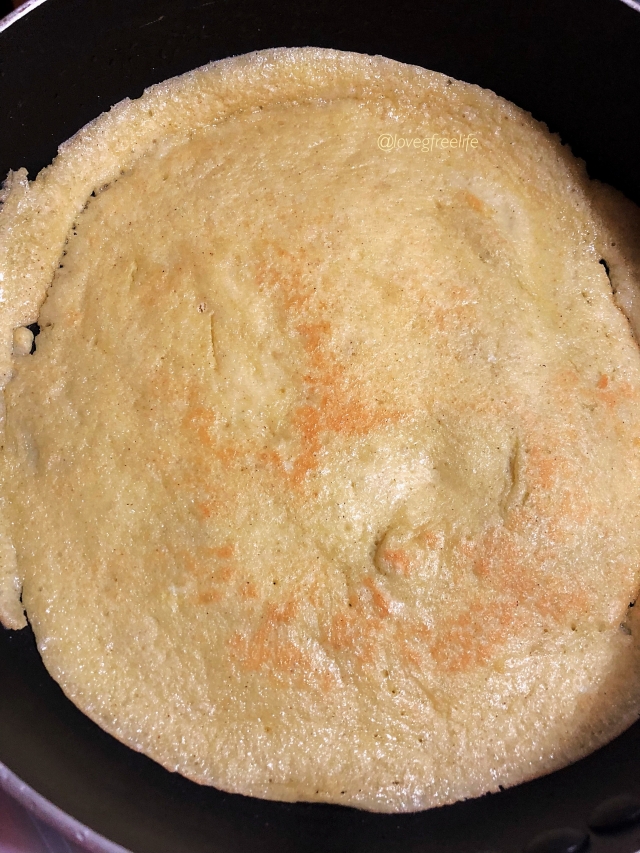
In a skillet pan on medium heat, spray the pan with coconut spray. Add a very thin layer of the crepe mixture to the pan. It will start to pull up on the sides and you know you are ready to flip the crepe.  Be careful because they can easily break since they are so thin.

crepes 2

After the crepes have finished cooking, add a generous layer of hazelnut spread. Add strawberries on top and fold. You can get creative here and add different fruits or combinations of tasty ingredients. Have fun with it!

crepes 4

Below you will find a printable recipe card! Yay! I am now in the 21st century 🙂

Strawberry Chocolate Hazelnut Crepes

Ingredients

  • 1 cup of gluten free flour (or regular flour)
  • 2 eggs
  • 1 cup of soy milk (or the milk of your choice)
  • pinch of salt
  • Coconut oil spray (any nonstick spray will work)
  • Strawberries
  • Chocolate hazelnut spread

Directions

  1. In a blender, combine all the ingredients.
  2. In a large skillet pan, spray the inside with coconut oil spray so the crepe doesn’t stick.
  3. Add a VERY thin layer of the crepe mixture in the heated pan.
  4. When the edges start to get firm, gently flip over the crepe to cook on the other side.
  5. When both sides are cooked, fill your crepes with whatever you want! I used chocolate hazelnut spread and sliced strawberries. They were so good!!

Get creative with your crepes!! You can fill them with so many different combinations and they can be savory or sweet!

http://www.lovegfreelife.wordpress.com

crepes

Enjoy xoxo

What To Do With Your Herbs- Part 4-Pesto

Creamy Italian Pesto

3FE03B14-4DFC-4158-B372-A6F3E5F3962C

My herbs are growing like crazy that I can barely keep up with them! My tomato plant is massive, yet I haven’t actually gotten a tomato to eat! I have this mama squirrel that has an obsession with my deck/apartment. She has tried on more than one occasion to get inside. I haven’t seen her as much since I got Henley but while at work yesterday, mama squirrel got into the tomato plant and destroyed most of the tomatoes. Revenge I believe :/

At least I have my basil which was growing out of C.O.N.T.R.O.L.!!! So what’s an Italian girl to do??? Make pesto!

7D776832-8CDD-4E6C-991F-31861C1F94F5

What You Need: 

•4 cups of basil

•1/2-1 cup of olive oil

•1/3 cup of pine nuts

•1/2 cup Parma cheese

•3-4 cloves of garlic

5E6B96A6-3709-4E35-9C9E-CBFDB75D78FE

What To Do:  

•Put all your ingredients in a food processor or blender (food processor works better but I’ve done the wooden spoon trick in the blender many times).

•Blend together until smooth by adding 1/4 cup of olive oil at a time.

•I like to combine my pesto with pasta or over chicken! Xoxo

3FE03B14-4DFC-4158-B372-A6F3E5F3962C


What To Do With Your Herbs Part 3-Mint Mojitos!

What To Do With Your Herbs Part 3

Mint Mojitos!


Here is another “What To Do With Your Herbs” Part 3.  This time we are talking mint and making them into mojitos!! What I love about using mint for summer drinks is that it gives the drink such a refreshing taste, even if you add it to water.

Needless to say, my mint was over grown and it needed help! The great thing about this recipe is that you can interchange it with any seasonal fruit or flavored rum you would like.  The possibilities are endless!

What You Need:

Mint Leaves (about four or five large ones per drink)

1/2 oz Simple Syrup (1/2 cup of water and 1/2 cup of sugar, dissolved over heat)

1/2 Lime (juice)

2 oz Rum

Club Soda or Sparkling Water (I used Bubly)

Fresh Blackberries


What To Do:

  1. Muddle the mint leaves in a glass.  If you do not have a muddler, you can rip the leaves up and take a sturdy large spoon and jam it into the mint and try to break it up.  I mean this is real classy and how I do it haha

  1. Add in 4 four berries and mash with the mint leaves.
  2. Pour in the lime juice and the rum.
  3. Add a few ice cubes and top off your drink with sparkling water.
  4. ENJOY!

What To Do With Your Lettuce- Part 2

What To Do With Your Lettuce- Part 2

lettuce 1

As we continue on with this series, part one was about freezing your herbs with oil (Read the last post if you missed). This time, we are going to talk about all that lettuce I planted.

I am not going to lie, I have never grown lettuce before and had no idea what I was really doing.  I read online how to cut the lettuce so it would continue to grow. How you can achieve this is by cutting the outer leaves and leaving about an inch of the crown.  This will allow your lettuce to keep growing.

But, what if I don’t feel like eating my lettuce right away. What can I do with it so it won’t spoil?

lettuce 2

What You Need:

Lettuce

Bowl

Veggie Cleaner

Paper Towels

Water


What To Do:

  1. Rinse your lettuce according to your veggie cleaner or if you don’t have one, just rinse your lettuce to get rid of excess dirt.
  2. In the bowl, put a folded piece of paper towel covered in water (the paper towel, not the bowl) on the bottom.
  3. Add the lettuce in the bowl, pile them so they have some room to breathe.
  4. Put a damp piece of paper towel to cover the lettuce.  Make sure you rewet this paper towel once it gets dry.
  5. When you’re ready to eat it, it will be waiting! Just don’t go too many days otherwise your lettuce will not be that great.  I did this overnight and only had to rewet my paper towel once.  The lettuce was still crunchy and fresh tasting.

lettuce 3

It was so nice to have lettuce that I grew.  I know where my food is coming from (my mini garden haha) and I control what I feed my plants.  #nogmo #nopesticide  Bam! I feel like a real adult!


What To Do With Your Herbs Part 1

What To Do With Your Herbs <<Part 1>>

herbs 1

I love, love, love when the weather gets warmer and I can start planting herbs. This year, I am also growing tomatoes and lettuce. So the problem is, what can I do with all these herbs?

This will be a multi-part series throughout the Spring and Summer of ways to use herbs and veggies throughout the year.

One of my favorite (and easy) recipes to use with my extra herbs is chopping them up and putting them in an ice cube tray and freeze them with oil.  When you need to pick your herbs, like basil and parsley (which were the two that I used), sometimes you do not have enough to make pesto or you were trying to just shape your plant. The great thing about this recipe is that you can use any mixture of herbs and different oils.  Get <<C.R.E.A.T.I.V.E>>


What You Need:

Fresh Basil and Parsley (or another kind of herb)

Olive Oil and Coconut Oil (any oil will work)

Ice Cube Tray

What To Do:

  1. Pick your herbs and wash them with veggie wash.herbs 1
  2. Chop the herbs into small pieces.herbs 2
  3. Put the herbs in ice cube trays. You can make any type of mixtures you want. I made two just basil and two just parsley and the rest I mixed both together. I also used olive oil in some and coconut oil in some (1tablespoon so you can keep track for recipes)herbs 3
  4. Put the ice cube tray in the the freezer.  When frozen, I like to put them in a bag labeled when I made it and what it is.  herbs 4
  5. Whenever you need fresh herbs for a recipe, you now have them ready to use at anytime by just reaching into your freezer! This is especially great in the Winter!

Grilled Greek Lemon Chicken with Creamy Tzatziki Sauce

Grilled Greek Lemon Chicken with Creamy Tzatziki Sauce

2588CD42-1C5E-47BC-94A2-349FFD4B9322

<<• First of all, I have to apologize. I haven’t posted in months and there were many things that happened and I couldn’t keep up. I am sorry!

<<• Secondly, I want to thank you! Thank you for following my journey whether you just subscribed or have been with me since day one! I appreciate each one of you!

<<• Thirdly, I promised that I would share the good, the bad, and the ugly. Working full time, going to school at night full time, and expanding my wine biz, it’s been a lot. Plus I was in the hospital for a week and was diagnosed with my 6th autoimmune disease. I know, another one.

<<• So right now, I want to keep my life more zen. I’m not taking any classes this summer, so I want to dedicate my time, doing the things I love. Like this 🙂

<<• I know, I know… you’re asking where is that recipe? Why is there all this writing before the recipe? Can I just have the recipe?? Haha

Grilled Greek Lemon Chicken with Creamy Tzatziki Sauce

2588CD42-1C5E-47BC-94A2-349FFD4B9322

What You Need:

• Free Range, Organic Chicken

•Greek Spice Mixture

•Fresh Lemon Juice

•Olive Oil

•Greek Yogurt

•Cucumber

• 2 Large Garic Cloves, minced

•Salt and Pepper

What To Do:

1. Prepare the chicken to marinate for two hours (at least). In a ziplock baggie (gallon), throw in your chicken, 2 tablespoons of olive oil, a dash of salt, and the Greek spices.

E0C5AA8F-E773-4CED-AFAA-49824F3FA676

2. Wash and shred your cucumber. Place them between paper towels to get out the extra moisture out. Let that sit for an hour.

DC37219F-E10D-4FB8-9732-5B6E74229777

3. Make your Tzatziki Sauce. In a large bowl, combine a container of Greek yogurt, juice from half of a lemon, cucumbers, garlic, and salt to taste.

4. Let the Tzatziki Sauce chill in the fridge until it is time to eat.

E7531486-7E59-4147-9B23-D32CBFBD660D

5. Grill your chicken and eat with the Tzatziki Sauce!

Enjoy xoxo2588CD42-1C5E-47BC-94A2-349FFD4B9322

Vegan, Gluten Free Banana Bread

Vegan, Gluten Free Banana Bread

IMG_1334

I am loving being able to eat bananas again! And I have been wanting to make banana bread for weeks now. I still haven’t been able to successfully reintroduce eggs back into my diet but using a vinegar/”milk” base in baking has helped.

What You Need: 

1/4 Cup Soy Milk (or any “milk” preference)

1/2 Teapsoon Apple Cider Vinegar

1/2 Cup Vegan Butter, softened

1 Cup Brown Sugar

3 Large Extra Ripe Bananas

1 1/2 Teaspoons Vanilla

2 Cups Gluten Free Flour

1 Teapsoon Baking Powder

1/2 Teaspoon Baking Soda

1/4 Teapsoon Salt

1/2 Tablespoon Cinnamon (I know this is a lot, you can definitely half it but I love cinnamon)

Coconut Oil Spray

What To Do:

Preheat your oven to 350 degrees. Spray a loaf pan generously with coconut spray.

In a small bowl, mix the soy milk and vinegar. Let it sit for a few minutes. It will start to curdle a bit and thicken up. That’s what you want it to do!

In another small bowl, mix together your dry ingredients and set it to the side.

In a large bowl, cream together the butter and sugar. Add the bananas and blend really well, until there are only small chunks of banana left. Add in vanilla and the milk mixture.

Slowly add in the dry mixture, about a 1/2 cup at a time. Mix until all the ingredients are blended together.

Pour into the greased loaf pan and bake for 35-45 minutes. You want to make sure the center is cooked! I’m still getting used to my new oven so it took a bit longer.

IMG_1333

Enjoy xoxo

Vegan Pasta with Butternut Squash “Cheese”

Vegan Pasta with Butternut Squash “Cheese”

butternut squash pasta

So this delicious recipe was actually a mistake. I wanted to make cubed butternut squash, roasted in the oven but it was way too hot in my apartment to turn the oven on. So in skillet, I added the butternut squash with vegan butter. The butternut squash did not hold its shape but instead it started to become mushy. I went with it and added in some frozen broccoli. After tossing it in the pasta, it had a very similar texture to macaroni and cheese. So it felt like I was eating mac n cheese but really was eating butternut squash. This recipe is a must try!


What You Need:

Cubed, Butternut Squash

1/2 stick of Vegan Butter

Salt

Pepper

1 Tablespoon Dried, Crushed Garlic (can use less but I really enjoy it)

1 Teaspoon Dried Ginger

1/2 cup of Soy Milk

Lentil Pasta (you can use any kind you like)

What To Do:

In a skillet pan, add 1/2 the amount of vegan butter in to melt. Place in butternut squash and season with salt and pepper. Place a cover on top and stir every so often. Add in other seasonings. When the squash gets soft, it will start to fall apart. Continue to mash it until it is completely cooked. Add in 1/2 bag of frozen broccoli and cook until soft. Toss with pasta and serve warm.

butternut squash pasta

Enjoy xoxo!

Buffalo Garlic Hot Wings

Buffalo Garlic Hot Wings

IMG_0988

I finally unpacked enough kitchen stuff and used my oven for the first time! So what to cook???? Hmm…. well
hot wings are my favorite!!! Except that when you order them at a restaurant, often times they are rolled in flour first. These are my version of gluten free baked not rolled in flour and fried, wings.

What You Need:

Chicken Wings

Salt and Pepper

Crushed, dried Garlic

Hot Sauce (I like Franks Red Hot Sauce)

Honey

Cornstarch

What To Do:

Salt and pepper chicken wings and put on a cookie sheet. Cook at 425 degrees for 20 minutes, turn them over and cook for about 20 more. They should be crispy looking on the outside when they are done.
For the sauce, any type of gluten free hot sauce. Everyone has their preference! I like to add a squeeze of honey and 1 tbsp of the crushed, dried garlic. If you like a thicker sauce, add a little bit of cornstarch (1/2 tsp) to the hot sauce (1/2-3/4 c)  Cook on low. When the wings are done, mix them with the sauce. Grab your favorite gluten free dressing and enjoy!


Pan Seared Lemon Pepper Sea Scallops

Pan Seared Lemon Pepper Sea Scallops

scallops

I love, love, love seafood! Thankfully, it is not something that I am allergic to. One of the best parts about living downtown on the water is that there is a surplus of fresh seafood that is harvested locally. I will walk to one of the many seafood shops and get whatever I am in the mood for that day.


Scallops are one of my favorite types of seafood. Scallops are a great source of protein, packing in over 80 percent. They are also high in magnesium and potassium. Potassium is crucial to the health of our bodies. It boosts the nervous system, prevents muscle cramps, and improves bone health and muscle growth. Potassium also reduces anxiety and stress!


What You Need:

Scallops

1/2 Lemon

Olive Oil

Pepper

Salt

Garlic Flakes

What To Do:

Season the sea scallops with salt, pepper and garlic flakes. In a preheated, hot pan, drizzle a bit of olive oil. Carefully add in sea scallops and leave them! You want them to get a nice crust on them and if you keep touching them, they will start to fall apart. You want to cook the scallops for 1-½ minutes per side. When the scallops are cooked, squeeze fresh lemon juice over the top and enjoy!

scallops